Yaesu Musen 20345X40 AMATEUR RADIO WITH SCANNING RECEIVER User Manual OM
Yaesu Musen Co., Ltd. AMATEUR RADIO WITH SCANNING RECEIVER OM
Contents
- 1. User Manual
- 2. User Manual 1
- 3. User Manual 2
- 4. User Manual 3
- 5. User Manual 4
- 6. User Manual 5
- 7. User Manual 6
- 8. User Manual 7
- 9. User Manual 8
- 10. User Manual 9
- 11. User Manual 10
- 12. User Manual 11
- 13. User Manual 12
- 14. User Manual 13
- 15. User Manual 14
- 16. User Manual 15
- 17. User Manual 16
- 18. User Manual 17
- 19. User Manual 18
- 20. User Manual 19
- 21. User Manual 20
- 22. User Manual 21
User Manual 11

113
Convenient Functions
UsingtheDTMFFunction
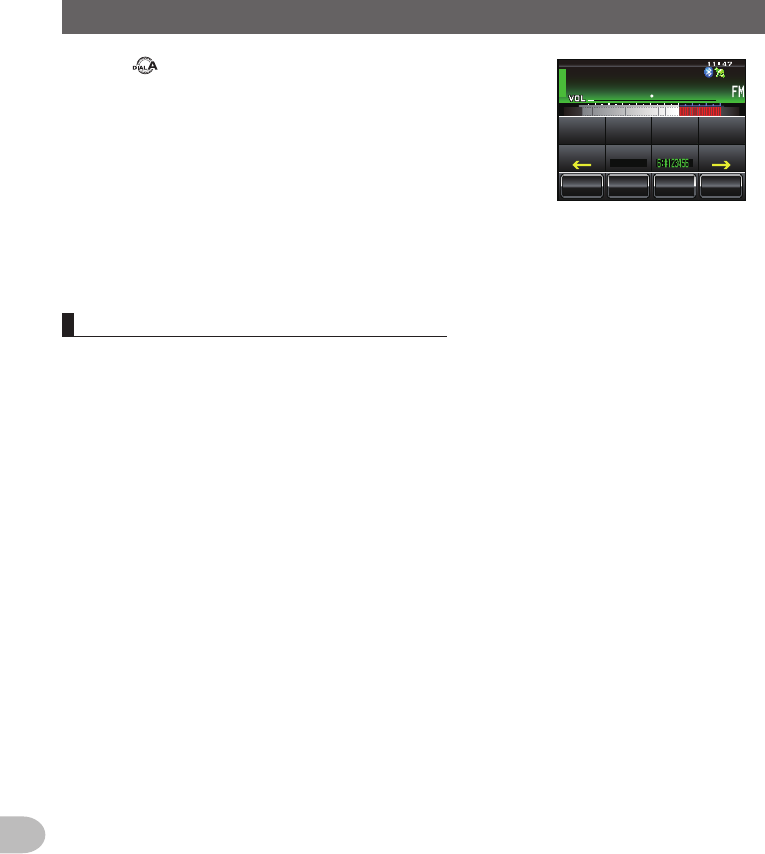
7 Touch the character keys to input the DTMF code
Tip The DTMF code can also be input using the character
keys on the microphone.
8 Touch [ENT]
The DTMF code will be set.
Tip Repeat Steps 5 to 8 when registering additional numbers
in the other channels..
ᲽᲿᲿᲿᲿ
ᲹᲺ
ᲽᲾ
Ჿ ᳀ ᳁
᳂
#
$
%
&
&
5RCEG
'06
9 Press for one second or longer
The DTMF code will be set and the display will return to the previous screen.
Tip The display can also be returned to the previous screen by touching [BACK] twice.
TransmittingtheregisteredDTMFcode
1 Press for one second or longer
The set-up menu will be displayed.
2 Touch [SIGNALING]
The menu list will be displayed.
$#%-
$#%-
6:4:
5'672/'07
4'5'6
%.10'
%10(+)9Ჰ4'5
5%#0
&+52.#;
5+) 0#.+0)
#245 126+10
5&%#4&
/'/14;
#
%#..5+) 0
3 Turn , or touch the screen to select [3AUTODIALER]
4 Touch [3AUTODIALER] to select “ON”
The auto dialer will switch between “ON” and “OFF”
each time it is touched.
5 Press for one second or longer
The display will return to the previous screen.
Tip The display can also be returned to the previous screen
by touching [BACK] twice.
6 Press
The function menu will be displayed.
$#%-
$#%-
&%5%1&'
610'53.(4'3
&6/(/'/14;
#761&+#.'4
5+) 0#.+0)
ᲸᲺ
1((
*\
Ჽ᳀᳀Ჹ
Ჺ
Ż
7 Touch [DTMF]
The character will turn orange in color.
Tip When [DTMF] is not displayed in the menu, use [BACK]
or [FWD] to switch the menu.
ᲹᲽᲾᲸᲸ
ᲹᲺ᳀;1-1*#/#
᳀ᲾᲸ
ᲽᲸᲸ61-;1Ჺ
/76'
5%12'
/8 53.
$#%- (9&
/8 /76'
5%12'
53.
01+5'
53.&6/(
Application for FCC / IC
FCC ID: K6620345X40 / IC: 511B-20345X40
114
Convenient Functions
UsingtheDTMFFunction
8 Turn to select the DTMF code
9 Press the microphone [PTT]
The DTMF code will be sent out automatically.
ᲹᲽᲾᲸᲸ
ᲹᲺ᳀;1-1*#/#
᳀ᲾᲸ
ᲽᲸᲸ61-;1Ჺ
/76'
5%12'
/8 53.
$#%- (9&
/8 /76'
5%12'
53.
01+5'
53.&6/(
10 Release the microphone [PTT]
The transmission will continue until the DTMF signal is sent out.
SendingouttheDTMFcodemanually
1 Press and hold down the microphone [PTT] and press [0] to [9], [✽], [#], [A] to [D]
2 Release the microphone [PTT]
The transmission will continue until the DTMF signal is sent out.
Application for FCC / IC
FCC ID: K6620345X40 / IC: 511B-20345X40
115
Convenient Functions
UsingtheTimerFunction
Usingthestopwatch function
This radio is equipped with a lap timer and countdown timer. These can be used by
switching to the timer / clock screen.
Displayingthetimer/clockscreen
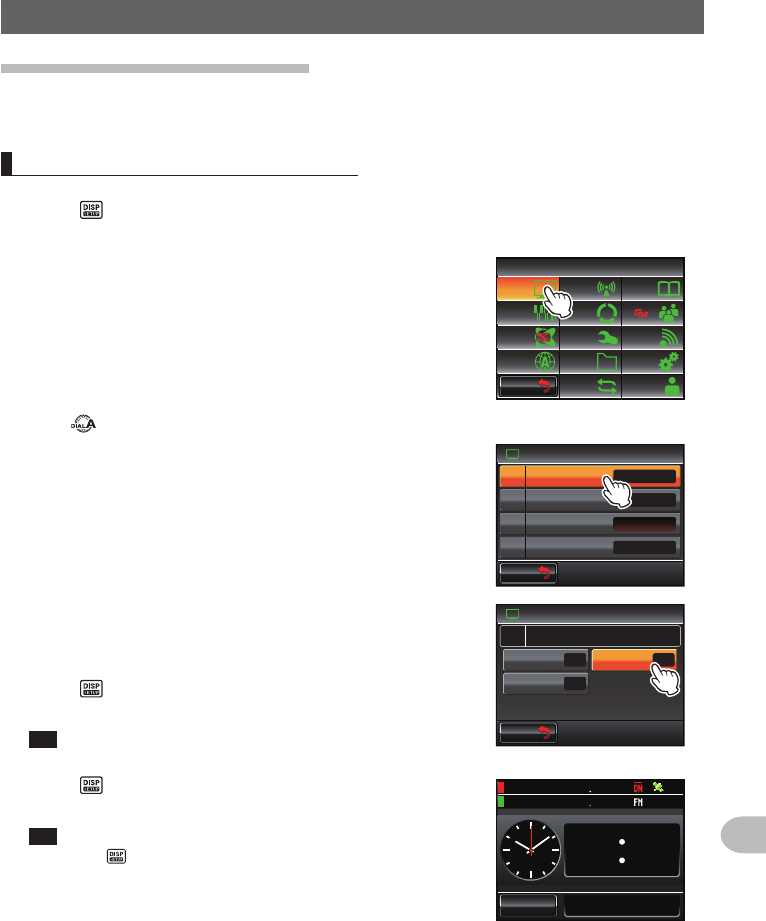
1 Press for one second or longer
The set-up menu will be displayed.
2 Touch [DISPLAY]
The menu list will be displayed.
$#%-
$#%-
6:4:
5'672/'07
4'5'6
%.10'
%10(+)9Ჰ4'5
5%#0
&+52.#;
5+) 0#.+0)
#245 126+10
5&%#4&
/'/14;
#
%#..5+) 0
3 Turn , or touch the screen to select [1DISPLAYSELECT]
4 Touch [1DISPLAYSELECT]
The screen for setting the various screens on or off
will be displayed.
Ż
6#4)'6.1%#6+10
&+52.#;
&+52.#;5'.'%6
#0)'41
$#%-)4170&%1.14
%1/2#55
9+&'$#0&5%12'
Ჹ
Ჺ
$#%-
$#%-
5 Touch [TIMER/CLOCK] to select “ON”
Each time this is touched, the setting will switch
between “OFF” and “ON”.
6 Press for one second or longer
The display will return to the previous screen.
Tip The display can also be returned to the previous screen
by touching [BACK] twice.
&+52.#;
)25+0(1
#.6+67&'((1((1
((1
6+/'4%.1%-
&+52.#;5'.'%6Ჹ
$#%-
$#%-
7 Press twice briefly
The timer/clock screen will be displayed.
Tip The screen will change in the following sequence each
time is pressed when both the altitude display screen
and GPS screen are “ON”.
Normal frequency display → Compass/Lat&Lon display
screen → Altitude display screen → Timer/Clock screen
→ GPS screen
ᲺᲸᲺ
ᲸᲹ
ᲹᲸ ᳁
Ჸ
#7)
/1&'
Ჸ
1
8(Ჹ
ᲽᲸ
Ჸ
ᲽᲸᲸ
Application for FCC / IC
FCC ID: K6620345X40 / IC: 511B-20345X40
116
Convenient Functions
UsingtheTimerFunction
Usingthelap timer
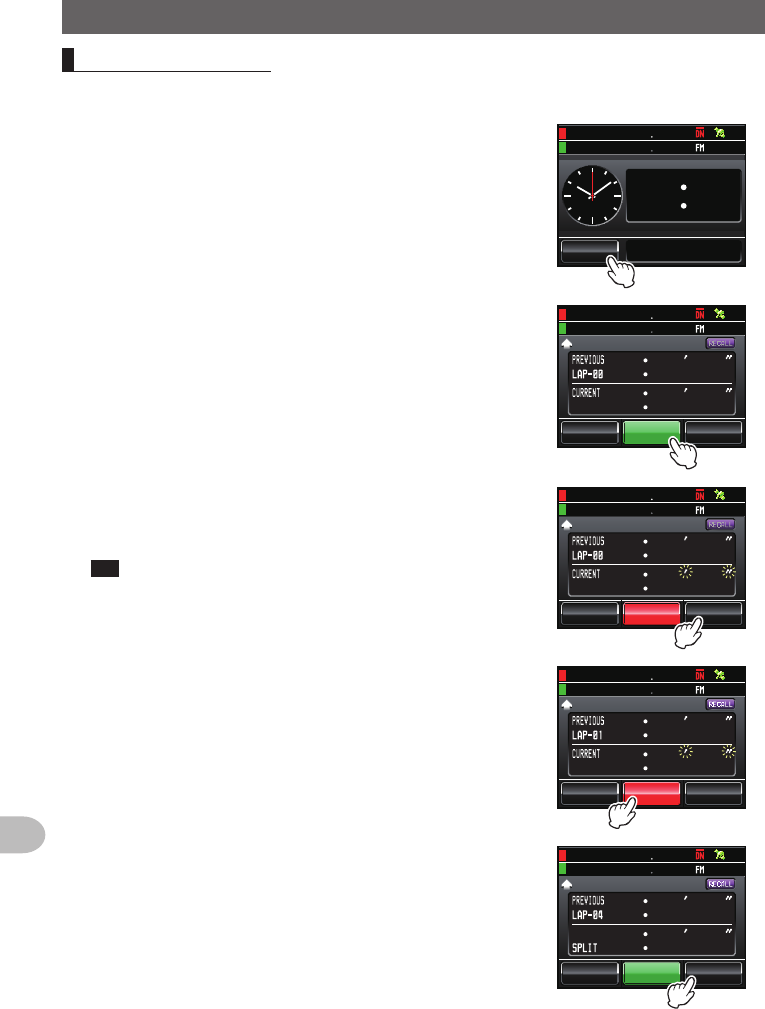
1 Display the timer / clock screen
2 Touch [MODE]
The lap timer will be displayed.
ᲹᲸ ᳁
Ჸ
/1&'
ᲺᲸᲺ
ᲸᲹ#7)
Ჸ
1
8(Ჹ
ᲽᲸ
Ჸ
ᲽᲸᲸ
3 Touch [START]
The timer will start.
Ჸ
ᲸᲸᲸ Ჸ
ᲸᲸᲸ
/1&'
6+/'4
56#46 4'5'6
Ჸ
1
8(Ჹ
ᲽᲸ
Ჸ
ᲽᲸᲸ
4 Touch [LAP]
The lap time will be saved in the memory each time it
is touched.
Tip Up to 99 lap times can be saved in the memory. Ჸ
ᲸᲸᲸ Ჸ
ᲸᲸᲸ
/1&'
6+/'4
.#25612
Ჸ
1
8(Ჹ
ᲽᲸ
Ჸ
ᲽᲸᲸ
5 Touch [STOP]
The timer will stop.
Ჸ
ᲸᲸᲸ Ჸ
ᲸᲸᲸ ᲺᲹ
/1&'
6+/'4
.#25612
Ჸ
1
8(Ჹ
ᲽᲸ
Ჸ
ᲽᲸᲸ
The lap times and split times will be erased when
[RESET] is touched.
ᲸᲸ
ᲸᲸ
/1&'
6+/'4
56#46 4'5'6
Ჺ
Ჹ
Ჽ᳁
ᲽᲽ
Ჸ
Ჸ
1
8(Ჹ
ᲽᲸ
Ჸ
ᲽᲸᲸ
Application for FCC / IC
FCC ID: K6620345X40 / IC: 511B-20345X40
117
Convenient Functions
UsingtheTimerFunction
The lap time measured in the past will be displayed
when [RECALL] is touched. When there are multiple
lap times, touch [] or [] to switch between the lap
times. ᲸᲸ
ᲸᲸ
/1&'
6+/'4
Ჺ
Ჹ
Ჽ᳁
ᲽᲽ
Ჸ
Ჸ
1
8(Ჹ
ᲽᲸ
Ჸ
ᲽᲸᲸ
6 Touch briefly twice
The display will return to the previous screen.
Tips • Touch [RECALL] when the previous lap times are being displayed and then turn twice.
• The screen will change in the following sequence each time is pressed when both the
altitude display screen and GPS screen are “ON”.
Normal frequency display → Compass/Lat&Lon display screen → Altitude display screen →
Timer/Clock screen → GPS screen
Usingthecountdown timer
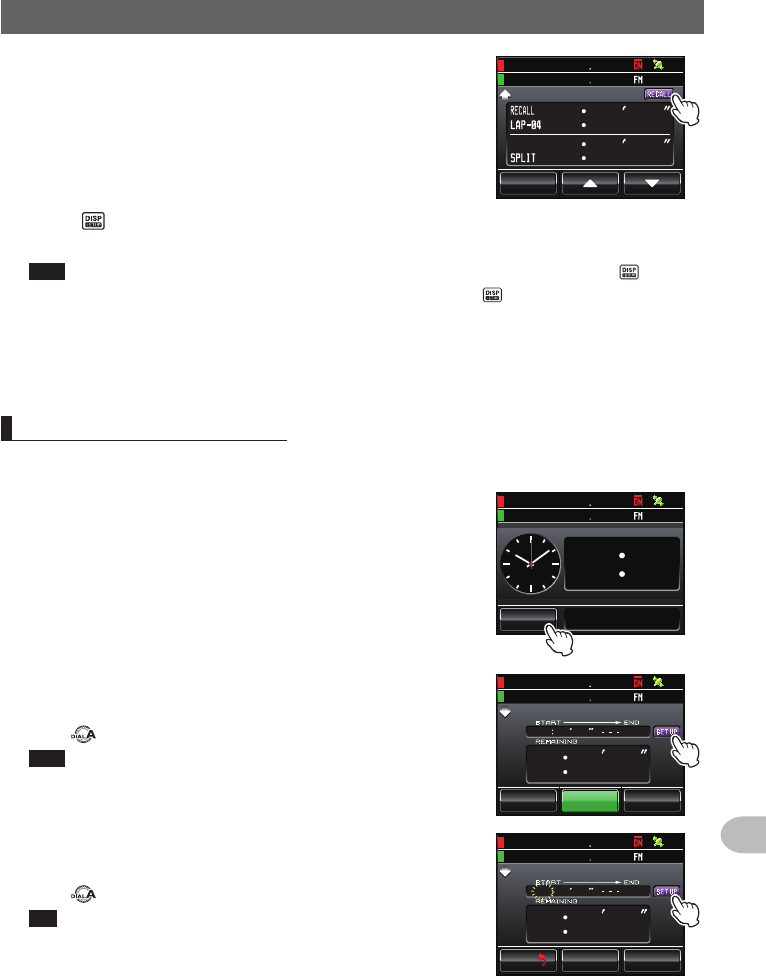
1 Display the timer / clock screen
2 Touch [MODE] twice
The countdown timer will be displayed.
ᲹᲸ ᳁
Ჸ
/1&'
ᲺᲸᲺ
ᲸᲹ#7)
Ჸ
1
8(Ჹ
ᲽᲸ
Ჸ
ᲽᲸᲸ
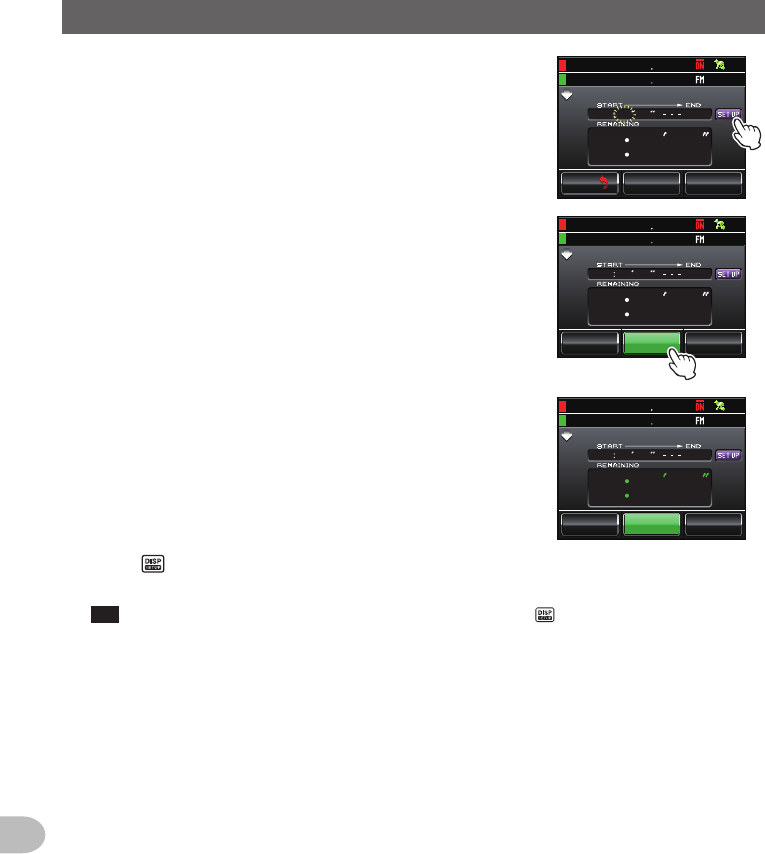
3 Touch [SETUP]
The “Hour” of the start time will blink.
4 Turn to set the hour
Tips • The hour can be set between 00 and 99.
• The time can also be set by touching [+] or [-].
Ჸ
ᲸᲸ ᲸᲸ
Ჸ
Ჸ
Ჸ
%1706& 1906+/'4
/1&' 56#46 4'5'6
Ჸ
1
8(Ჹ
ᲽᲸ
Ჸ
ᲽᲸᲸ
5 Touch [SETUP]
The “Hour” will be set, and “Minute” will blink.
6 Turn to set the minute
Tip The time can also be set by touching [+] or [-].
ᲸᲸᲸ
Ჸ
Ჸ
Ჸ
%1706& 1906+/'4
ᲸᲹ
ᴁᴃ
Ჸ
1
8(Ჹ
ᲽᲸ
Ჸ
ᲽᲸᲸ
$#%-
$#%-
Application for FCC / IC
FCC ID: K6620345X40 / IC: 511B-20345X40
118
Convenient Functions
UsingtheTimerFunction
7 Touch [SETUP]
The “Minute” will be set and the set time will be
displayed in the counter.
ᲸᲸᲸ
Ჸ
Ჸ
Ჸ
%1706& 1906+/'4
ᲸᲹ
ᴁᴃ
Ჸ
1
8(Ჹ
ᲽᲸ
Ჸ
ᲽᲸᲸ
$#%-
$#%-
8 Touch [START]
The countdown timer will start.
/1&' 56#46 4'5'6
ᲸᲸᲹ
Ჸ
ᲸᲸᲸ
Ჸ
Ჸ
Ჸ
%1706& 1906+/'4
Ჸ
1
8(Ჹ
ᲽᲸ
Ჸ
ᲽᲸᲸ
When the set time has passed, a beep will sound
and the time will be displayed as “00:00’00” in green
characters.
Touch [STOP] to pause the timer in between.
Touch [START] to restart the countdown and touch
[RESET] to measure from the start again.
ᲸᲸᲹ
Ჸ
ᲸᲸᲸ
ᲸᲸ
ᲸᲸ ᲸᲸ
Ჸ
%1706& 1906+/'4
/1&' 56#46 4'5'6
Ჸ
1
8(Ჹ
ᲽᲸ
Ჸ
ᲽᲸᲸ
9 Press briefly twice
The display will return to the previous screen.
Tip The screen will change in the following sequence each time is pressed when both the
altitude display screen and GPS screen are “ON”.
Normal frequency display → Compass/Lat&Lon display screen → Altitude display screen →
Timer/Clock screen → GPS screen
Application for FCC / IC
FCC ID: K6620345X40 / IC: 511B-20345X40
119
Convenient Functions
UsingtheTimerFunction
UsingtheAPOfunction
When the APO (Automatic Power-off) function is set to ON, the power supply to the
radio will be automatically switched off when there has been no operation for a preset
period of time. A notification beep will sound one minute before the power is turned off.
This helps to prevent the battery from being used up when you forget to switch the radio
off when connected to a car battery.
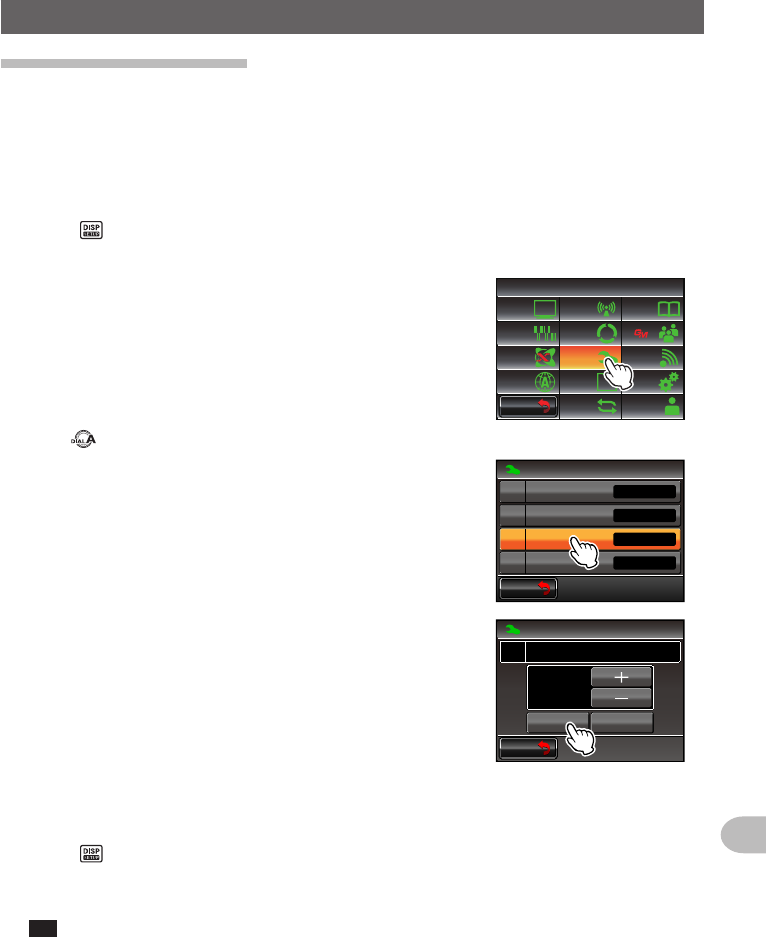
1 Press for one second or longer
The set-up menu will be displayed.
2 Touch [CONFIG]
The menu list will be displayed.
$#%-
$#%-
6:4:
5'672/'07
4'5'6
%.10'
%10(+)9Ჰ4'5
5%#0
&+52.#;
5+) 0#.+0)
#245 126+10
5&%#4&
/'/14;
#
%#..5+) 0
3 Turn , or touch the screen to select [13APO]
4 Touch [13APO]
The screen for selecting “ON”, “OFF” and the time
until the power is turned off after operations will be
displayed.
$#%-
$#%-
%10(+)
70+6
#21
6161((
1((
014/#.
/'64+%
4:%18'4#)'ᲹᲹ
ᲹᲺ
Ჹ
Ჹ
5 Touch [ON]
6 Touch [+] or [-] to select the time until the power
supply is switched off
The time will change by one step each time it is
touched. The time step can be selected from the
following 14 steps.
“0.5hour” “1.0hour” “1.5hour” “2.0hour” “3.0hour”
“4.0hour” “5.0hour” “6.0hour” “7.0hour” “8.0hour”
“9.0hour” “10.0hour” “11.0hour” “12.0hour”
$#%-
$#%-
JQWT
Ჽ
ᲹᲸ
%10(+)
#21
Ჹ
10 1((
7 Press twice briefly
The APO function will be switched on and the display will return to the previous
screen.
Tip The display can also be returned to the previous screen by touching [BACK] twice.
Application for FCC / IC
FCC ID: K6620345X40 / IC: 511B-20345X40